News, features and tips from the Google Mobile team
"Reshare" in Google Buzz
Posted by Sam Goto, Software Engineer
The other day I posted this video to the version of Buzz we use inside of Google. A few people commented on it, 13 liked it, and 68 of my coworkers thought it was interesting enough that they wanted to share it with their own followers. Collectively, thousands of people watched it, many of whom were many degrees away from me.
For the last couple weeks we've been testing reshare — and today we’re excited to roll it out to everyone. If you don't see the "Reshare" link quite yet, hang tight. It should be on for everyone by the end of the day.
How reshare works
When you find an interesting buzz post you want to reshare, instead of copying and pasting it (and maybe attributing the original poster with an @reply along the way), you can now reshare posts with two clicks.
First, click “Reshare”:

Then type up anything you want to add and click “Post”:

Your post will include a link to the original post:

Note that this only works for public posts; private posts won’t have the reshare link since the original poster intended to limit the audience of their post.
A little more background
Reshare has been one of our top user requests, so we hope we’ve made a number of you happy. We realize that just as many will likely wonder why we decided to implement it the way we did. So, here’s a bit more background for those who are curious:
- First, back to those two clicks: one click vs. two click reshare was a hard choice (I know, it doesn’t sound so hard, but we spent a lot of time on this!). Ultimately, we chose to go with two clicks because we want people to be able to reshare publicly or privately and also encourage resharers to add their own new content to the post.
- If you follow a bunch of people who all reshare the same thing, the last thing you want is for that same post to appear over and over again. When this happens, similar posts get collapsed, so you should only see each thing once.
- You’ll notice that resharing creates a new post, effectively forking the conversation. To fork or not fork was a decision we debated for a while. Ultimately, we think forked conversations help create more varied, intimate discussions around a single item. We realize people may want a non-forking version too, so we’re thinking about how to do that as well.
- When there is a chain of reshares, the names of all of the people who publicly reshare the post appear on the original item, even if they’re not directly connected to the original author. If you share something that ends up getting passed around by lots of other people, it’s pretty cool to see that.
- If you “like” a reshare, you don’t automatically also “like” the original post. Imagine what would happen if I reshare a very positive movie review and write “What a joke! This movie was terrible!” Someone who likes my post probably doesn’t want their “like” showing on the original post praising the film, too.
Overall, we’ve made a lot of progress since my original ASCII mockups…

…and after a lot of debate, we even settled on what to call it…

…but reshare is still very much a work in progress. We wanted to launch and iterate so be sure to let us know what you think in the forum or on Buzz.
Tips & Tricks: Comments in Google documents
In April, we launched a new version of Google documents. One feature that makes collaboration easier is improved commenting.
Connecting text to note
Comments let you make suggestions about the text in your document without modifying the document itself. When you click on a comment, the text it’s referring to is highlighted. And vice-versa — when you select highlighted text in your document, we identify the associated comment.

Additionally, when you move highlighted text around within the document, the comments will follow the text and re-arrange to keep your annotations in order.
Comment on the sidelines
Comments live outside the margins of the editing space — but are linked to text in the document. This means you can leave notes for others without cluttering the document.
We’ve also made it easier to hide comments in your document. You can show or hide all comments by checking or un-checking the Show comments menu item.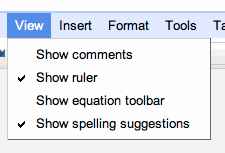
A detailed view of the comment box
Finally, we think the comment feature will give you flexibility to work with your notes in an intuitive and user-friendly way.
Finally, we think the comment feature will give you flexibility to work with your notes in an intuitive and user-friendly way.
You can delete a comment by pressing the trash can icon above a comment. Or, you can respond to a comment by pressing the reply arrow, and it will show up just below the comment you’re responding to. You can hide a comment by marking the “X” button at the top of the comment.

Collaboration at the next level
The new version of Google documents is a built around collaboration, allowing you to work in real-time and to see what others are typing character by character. The new comment features makes it much easier to keep track of your ideas and notes while you work closely with others.
To try out improved commenting and other features, you’ll need to take the new preview version of Google documents for a test drive. You can opt-in by visiting the Editing tab in the Google Docs settings.
Posted by: Edgard Lindner, Software Engineer
Facebook’s New Privacy Guide Explained

Responding to user backlash, Facebook today unveiled its overhauled Privacy Controls. On first look, it’s a radically different set of tools with a redesign control setup than what you’re used to. The now “classic” granular settings are still in place, but a new set of umbrella options lets you quickly change several options at once as a first line of privacy defense. The strategy appears to be centered on making users more comfortable with their sharing settings, while providing more control over their online profiles. History has shown us that Facebook changes like this are never easy, so while the changes won’t roll out for a few weeks, read on to learn how to use the new controls when they arrive.
Continue reading Facebook’s New Privacy Guide Explained
Filed under: Web, Social Networking
Facebook’s New Privacy Guide Explained originally appeared on Switched on Wed, 26 May 2010 18:40:00 EST. Please see our terms for use of feeds.
Sask. population could hit 1.3M in 2036
Saskatchewan’s population could grow by as much as 268,000 over the next quarter century, approaching 1.3 million by 2036, Statistics Canada projects.
WeTab street date pushed back to mid-September

WeTab, WePad — whatever name you use, it’s obvious that the gang at Neofonie doesn’t exactly run the tightest ship. (And yes, we’re still feeling a little stung from the product launch, where they tried to pass off Windows 7 as Linux.) If Amazon.de is to be believed, it looks like the €460 ($566) wonder won't be available now until mid-September. This isn't exactly the sort of thing that inspires confidence in pre-order customers, but who knows? Maybe some amusing behind-the-scenes drama is unfolding as we speak. You know how we love our schadenfreude.
[Thanks, Sebastian]
WeTab street date pushed back to mid-September originally appeared on Engadget on Wed, 26 May 2010 16:54:00 EDT. Please see our terms for use of feeds.
Permalink  Liliputing |
  TouchMeMobile | Email this | Comments
The Human Scientist Infected With a Computer Virus [Mad Science]

This is Dr. Mark Gasson. He’s a human being who’s managed to contract a nasty computer virus. Don’t feel too bad for him, though: he did it to himself. More »

Computer virus – Security – Malicious Software – Viruses – Detection and Removal Tools
Nitro PDF Reader Provides Advanced PDF Tools for Free [Downloads]

Windows: Want to create PDF files from plain documents, annotate and fill in existing PDFs, extract images, and leave notes for any PDF reader? Nitro PDF Reader does all that, and it’s a free download. More »

Nitro PDF – PDF – Data Formats – Document – Publishing
Google Working on Voice Recognition for All Browsers [Speech Recognition]

In some ways it seemed inevitable, but in other ways, it’s still an awesome idea. InfoWorld reports that Google is building speech recognition technologies for browsers, and not just their own Chrome—all browsers, as an "industry standard." Beyond making certain searches easy to fire off with a spoken phrase, voice recognition might also give the web a whole new class of webapps that listen for audio cues. Do you want your browser to understand what you're telling it? Or is the keyboard still your preferred lingua franca for non-mobile browsing? [InfoWorld] More »
Speech Technology – Speaker recognition – Research – Google – Google Chrome
Half-Life 2 for Mac Commercial
Roughriders plates prove popular
Thousands of Saskatchewan Roughriders fans are showing their support by purchasing specialized green and white licence plates.
Tall tower proposal goes to Regina council
Regina city council is being asked to give its seal of approval to what could soon be Saskatchewan’s tallest building.
High bacterial rates found in bottled water
More than 70 per cent of bottled water samples from Canada contain bacterial rates that exceed recommended limits in the U.S., suggests a study presented at the general meeting of the American Society of Microbiology.
Ottawa pitches computer spam law
The federal government is re-introducing legislation to stop unwanted spam on computers and cell phones and guard against identity theft.
Customize Your WordPress Blog & Build an Audience
Want to quickly give your blog a fresh coat of paint and make it stand out from the pack? Here’s how you can customize your WordPress blog and make it uniquely yours.
WordPress offers many features that help you make your blog the best it can be. Although it doesn’t offer as many customization features as full WordPress running on your own server, it still makes it easy to make your free blog as professional or cute as you like. Here we’ll look at how you can customize features in your blog and build an audience.
Personalize Your Blog
WordPress make it easy to personalize your blog. Most of the personalization options are available under the Appearance menu on the left. Here we’ll look at how you can use most of these.
![sshot-2010-05-18-[21-22-31]](http://www.howtogeek.com/wp-content/uploads/2010/05/sshot20100518212231.png)
Add New Theme
WordPress is popular for the wide range of themes available for it. While you cannot upload your own theme to your blog, you can choose from over 90 free themes currently available with more added all the time. To change your theme, select the Themes page under Appearance.
The Themes page will show random themes, but you can choose to view them in alphabetical order, by popularity, or how recently they were added. Or, you can search for a theme by name or features.

One neat way to find a theme that suites your needs is the Feature Filter. Click the link on the right of the search button, and then select the options you want to make sure your theme has. Click Apply Filters and WordPress will streamline your choices to themes that contain these features.

Once you find a theme you like, click Preview under its name to see how your blog will look.

This will open a popup that shows your blog with the new theme. Click the Activate link in the top right corner of the popup if you want to keep this theme; otherwise, click the x in the top left corner to close the preview and continue your search for one you want.

Edit Current Theme
Many of the themes on WordPress have customization options so you can make your blog stand out from others using the same theme. The default theme Twenty Ten lets you customize both the header and background image, and many themes have similar options.
To choose a new header image, select the Header page under Appearance. Select one of the pre-installed images and click Save Changes, or upload your own image.

If you upload an image larger than the size for the header, WordPress will let you crop it directly in the web interface. Click Crop Header when you’ve selected the portion you want for the header of your blog.

You can also customize your blog’s background from the Background page under Appearance. You can upload an image for the background, or can enter a hex value of a color for a solid background. If you’d rather visually choose a color, click Select a Color to open a color wheel that makes it easy to choose a nice color. Click Save Changes when you’re done.

Note: that all themes may not contain these customization options, but many are flexible. You cannot edit the actual CSS of your theme on free WordPress blogs, but you you can purchase the Custom CSS Upgrade for $14.97/year to add this ability.
Add Widgets With Extra Content
Widgets are small addons for your blog, similar to Desktop Gadgets in Windows 7 or Dashboard widgets in Mac OS X. You can add widgets to your blog to show recent Tweets, favorite Flickr pictures, popular articles, and more. To add widgets to your blog, open the Widgets page under Appearance.
You’ll see a variety of widgets available in the main white box. Select one you want to add, and drag it to the widget area of your choice. Different themes may offer different areas to place Widgets, such as the sidebar or footer.

Most of the widgets offer configuration options. Click the down arrow beside its name to edit it. Set them up as you wish, and click Save on the bottom of the widget.

Now we’ve got some nice dynamic content on our blog that’s automatically updated from the net.

Choose Blog Extras
By default, WordPress shows previews of websites when visitors hover over links on your blog, uses a special mobile theme when people visit from a mobile device, and shows related links to other blogs on the WordPress network at the end of your posts. If you don’t like these features, you can disable them on the Extras page under Appearance. 
Build Your Audience
Now that your blog is looking nice, we can make sure others will discover it. WordPress makes it easy for you to make your site discoverable on search engines or social network, and even gives you the option to keep your site private if you’d prefer.
Open the Privacy page under Tools to change your site’s visibility. By default, it will be indexed by search engines and be viewable to everyone. You can also choose to leave your blog public but block search engines, or you can make it fully private.
![sshot-2010-05-19-[06-46-44]](http://www.howtogeek.com/wp-content/uploads/2010/05/sshot20100519064644.png)
If you choose to make your blog private, you can enter up to 35 usernames of people you want to be able to see it. Each private visitor must have a WordPress.com account so they can login. If you need more than 35 private members, you can upgrade to allow unlimited private members for $29.97/year.

Then, if you do want your site visible from search engines, one of the best ways to make sure your content is discovered by search engines is to register with their webmaster tools. Once registered, you need to add your key to your site so the search engine will find and index it.
On the bottom of the Tools page, WordPress lets you enter your key from Google, Bing, and Yahoo! to make sure your site is discovered. If you haven’t signed up with these tools yet, you can signup via the links on this page as well.

Post Blog Updates to Social Networks
Many people discover the sites they visit from friends and others via social networks. WordPress makes it easy to automatically share links to your content on popular social networks. To activate this feature, open the My Blogs page under Dashboard.

Now, select the services you want to activate under the Publicize section. This will automatically update Yahoo!, Twitter, and/or Facebook every time you publish a new post.

You’ll have to authorize your connection with the social network. With Twitter and Yahoo!, you can authorize them with only two clicks, but integrating with Facebook will take several steps.

If you’d rather share links yourself on social networks, you can get shortened URLs to your posts. When you write a new post or edit an existing one, click the Get Shortlink button located underneath the post’s title.

This will give you a small URL, usually 20 characters or less, that you can use to post on social networks such as Twitter.

This should help build your traffic, and if you want to see how many people are checking out your site, check out the stats on your Dashboard. This shows a graph of how many people are visiting, and popular posts. Click View All if you’d like more detailed stats including search engine terms that lead people to your blog.

Conclusion
Whether you’re looking to make a private blog for your group or publish a blog that’s read by millions around the world, WordPress is a great way to do it for free. And with all of the personalization options, you can make your it memorable and exciting for your visitors.
If you don’t have a blog, you can always signup for a free one from WordPress.com. Also make sure to check out our article on how to Start Your Own Blog with WordPress.

| Similar Articles | Productive Geek Tips |
| Latest Software Reviews | Tinyhacker Random Tips |
Canadian UFO Spiral hoaxer comes forward
What looked like numerous photographs and videos of a ship entering the cosmos was actually put together by not a team, but one person.
N. Korea to sever ties with S. Korea
North Korea says it will sever all ties and communication with Seoul as retaliation for what it calls a “smear campaign” over the sinking of a South Korean warship.
NASA halts trying to contact Phoenix lander
NASA has declared the Phoenix lander officially dead after failed attempts to regain contact.
SED’s dead, baby: Canon abandons development of new HDTVs, we take a look back

Oh, surface-conduction electron-emitter display (SED). We still remember the halcyon days of 2005 when we first laid eyes upon your black as a CRT / thin as a plasma or LCD self, and equally recognize the pain of each false start and delay that followed, each leading up to today’s announcement by Canon that it is abandoning SED HDTVs entirely. It had held out hope as late as last spring that the technology could have a future in professional displays, but Japan’s The Nikkei reports it simply couldn’t bring down costs enough. There’s still the possibility for a future in “image diagnostic equipment” but all those prototypes will never see the light of mass production. Check after the break for some of the highlights along the way, or just to imagine what might have been if not for lawsuits and technical issues.
Continue reading SED’s dead, baby: Canon abandons development of new HDTVs, we take a look back
SED’s dead, baby: Canon abandons development of new HDTVs, we take a look back originally appeared on Engadget HD on Tue, 25 May 2010 03:24:00 EDT. Please see our terms for use of feeds.
Permalink Reuters | Nikkei (registration required) | Email this | Comments
Farewell 24: Highs And Lows Of Days Gone By
Farewell 24: Highs And Lows Of Days Gone By A television resource updated many times a day with the latest in TV news, gossip, and reviews. All with attempted humor.